Beginner Tutorial
This tutorial will help newcomers to the Squarespace Developer Platform learn by doing. Check out this guide for more information on Squarespace Developer Platform functionality to see if it fits your needs.
Introduction
Let's get started working on the Squarespace Developer Platform. In this tutorial, we'll be enabling the Developer Platform on your website, setting up your development workflow using Git, and making your first edits to the template code!
To follow this tutorial, you should understand the fundamentals of HTML, CSS, JavaScript, and Git. If you aren't familiar with writing code, here's a list of recommended learning resources. Check out this guide for more information on the Developer Platform's functionality and to see if it fits your needs.
Part 2 - Displaying Dynamic Content
Part 6 - Creating a Blog Collection
Getting Started
In this tutorial, you'll be using Git to publish your template code to the Squarespace servers. Squarespace creates a hosted Git repository for each website, so that you can publish your code with git push.
To get started with a Squarespace website using git, follow these steps:
Create a site from the Beginner Tutorial Template
Now that the background for this tutorial is established, start by visiting the Beginner Tutorial Template demo site and clicking Create a Site Like This.
This demo will explore the process of creating a template on the Developer Platform.
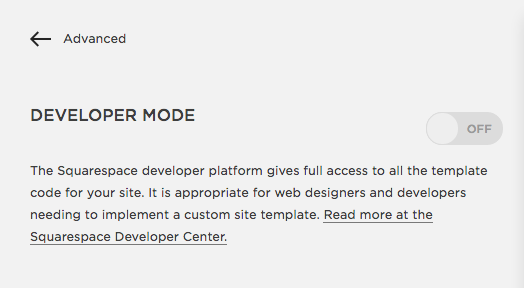
Enable Developer Mode
Now that you have a site, the next step is to enable Developer Mode.
- In the Home Menu, click Settings, click Advanced, and then click Developer Mode.
- Switch the toggle in the panel to On.
- Read the warning message and click Yes, I understand to confirm.
Note: When you enable Developer Mode, Squarespace forks your template to create an identical codebase that you can edit. You'll still see all content and Style Editor options while in Developer Mode. Read more about what changes you can expect while using the Developer Platform here.
Accessing your template files
Once Developer Mode is enabled, clone your template files via Git. Access your site's template files on the repository connected to your GitHub account. Below is an example of what the Git clone command will look like:
git clone https://github.com/{{ your_org }}/{{ your_repo }}.gitAfter cloning the template files, open the 'template' folder in a text editor you like. Sublime Text and Atom are popular options.
Template File Structure Overviews
Each Squarespace template is made up of several template files. Every template must have, at a minimum, a region file (usually named site.region) and a template configuration file named template.conf.
The .region File
A region file defines the layout of template pages. Typically, this file is used as the global site wrapper template, containing the site header, footer, and sidebars. Every template must have at least one .region file. More advanced templates can have multiple .region files describing the different layouts and layout sections (header, footer, sidebar etc.). Typically the 'site.region' file is used as the default layout. Region files are composed of standard HTML and JSON-T to render dynamic content.
The template.conf File
The template.conf file uses JSON to define the configuration of essential elements within the template. This is where you can:
- Name your template
- Specify layouts
- Add navigation sections
- Specify stylesheets to be rolled up into
site.cssand more.
Other Template Files
Depending on how a particular template was designed, it may or may not include all the folders listed below. Our tutorial template will begin with just a template.conf, site.region and some basic styles in a base.less file. Missing folders can be added using Git:
- /assets static design assets — example: images, fonts and icons
- /blocks block files — JSON-T "partials" — reusable code that can be included elsewhere in your JSON-T. Example navigation.block
- /collections collection files — [collection].list, [collection].item, [collection].conf
- /pages static page files — [static].page, [static].page.conf
- /scripts JavaScript files — site.js
- /styles stylesheet files — styles.css, styles.less
- [root] site-wide files — site.region, template.conf
For a more in-depth explanation of these template directories and their purpose, take a look at our full Template Overview.
Once you've accessed and downloaded your template files, the next step is to make a first change to template code.
Part 1 - Making Changes
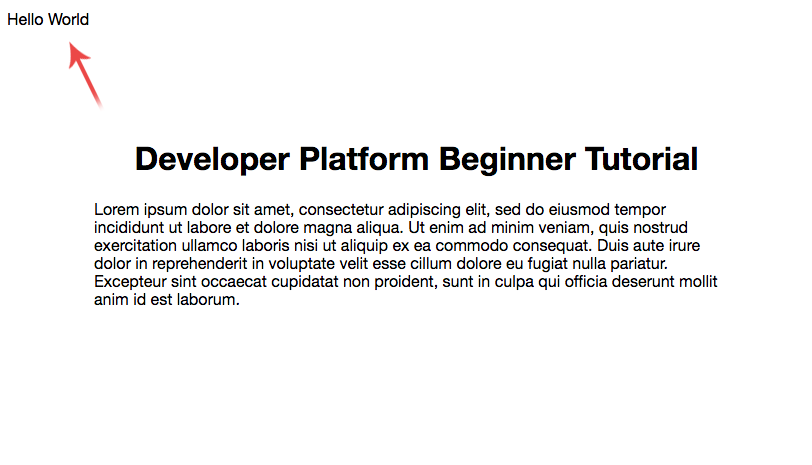
Before we get to the fun stuff, let's make a small change to the site.region file. This will show you how to publish code to Squarespace, and familiarize you with the workflow. Locate the tag within the site.region file and insert the following snippet directly after the opening of your body tag:
<p>Hello, World!</p>Next, git commit and git push it to your live site. Once you've pushed these changes, refresh your browser to see the change on your live site. It should look something like this:
Now that we've successfully made our first modification with the Developer Platform, we'll apply this new knowledge in more advanced ways in Part 2.
Part 2 - Displaying Dynamic Content
In part 1 you made a simple change to your website's HTML. You can add any static HTML, CSS or JavaScript code to your Squarespace website. However, the power of the Squarespace Developer Platform is it's ability to display dynamic content. In other words, content from the Squarespace online editor.
To display dynamic content, you'll need to use JSON-T, the template language used on the Squarespace platform. Let's try adding some JSON-T to your template.
To begin, locate your site header in the site.region file. It should look like this:
<header class="header">
  <h1 class="site-title">
    <a href="/">
      Developer Platform Beginner Tutorial
    </a>
  </h1>
</header>
Replace your current header with this new snippet:
<header class="header">
  <h1 class="site-title" data-content-field="site-title">
    <a href="/">
      {website.siteTitle}
    </a>
  </h1>
</header>
In this new snippet, we're using JSON-T to insert the site title from the Squarespace Content Management System (CMS). The JSON-T within the HTML code is denoted by curly braces. ({})
Now that we've updated the code for our site title, let's replace the title text with content from the Squarespace online editor.
![]()
Notice that as you edit the site title, the new title will update on your website.
JSON-T can be used to insert several different data values from the CMS, such as the text of a blog post a business' address, or images from a gallery. This is called the context. To view the context for a page, add ?format=json-pretty to the end of the URL. For example:
http://your-website.squarespace.com/?format=json-pretty
This will output the context using JavaScript Object Notation (JSON). You can see that the siteTitle is in the website section of the JSON data:
"website": {
  ...
    "siteTitle" : "Developer Platform Beginner Tutorial",
  ...
}
Note: For more information about the JSON context, visit this guide. For more information on JSON-T variables and directives, visit this guide. To learn how to add a site title via the CMS, visit the Adding a site title help guide.
Part 3 - Adding Pages
So far you've made a change to your template with git, and added some dynamic content to your website with JSON-T. However, this website is still very basic. Let's add some pages!
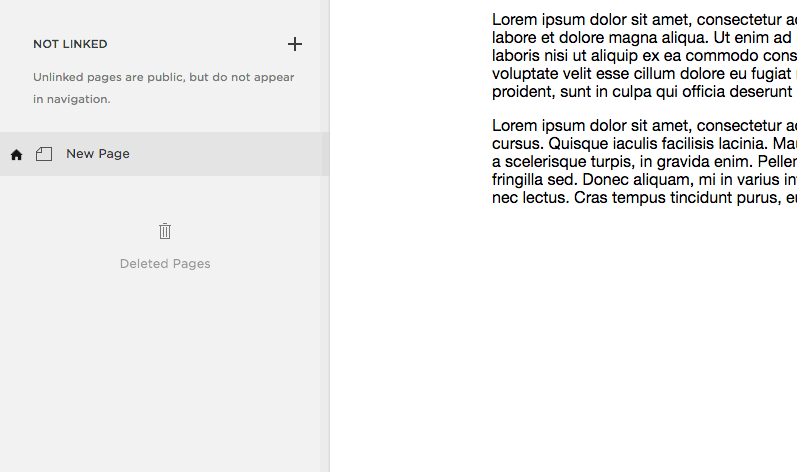
To start, create a Regular Page. You can do this through the Pages panel in the online editor, click the + icon to create a Regular Page on your site. To learn more, visit Adding pages to your navigation.
Unfortunately, adding a page doesn't do much yet. That's because we haven't yet added the JSON-T necessary to make the page editable. In order to do this, an update to the site.region file is required. Just like in Part 2, you can use JSON-T to insert content from the CMS, making the page dynamic.
To do this, replace the <main class="content"></main> tags with the following snippet:
<main class="content">
  <section id="page" role="main" data-content-field="main-content">
    {squarespace.main-content}
  </section>
</main>
After you've made this change, commit and push your code to the live site. Now when you refresh your home page in the Squarespace editor, you should be able to add images and text to the page.
Deep Dive: In the above snippet you've added the JSON-T variable {squarespace.main-content} that displays the page content from the CMS. Squarespace also needs load an editor interface, letting users drag-and-drop text and images onto the page. The <section data-content-field="main-content"> tag tells Squarespace where to put the editor interface.
Part 4 - Making a Navigation
Let's say you've added a few pages to your website. How will visitors find those pages? In this section we'll add a navigation so visitors can discover and navigate through your site. This requires three parts:
- Changes to your
template.conffile to configure the navigation, - A
navigation.blockfile that contains the JSON-T for rendering the navigation menu, and - A
<squarespace:navigation>tag in yoursite.regionfile to place the navigation onto the page.
Configuring your Navigation
Navigation sections are defined in the template.conf file. The navigations key in the template.conf file defines the Navigation areas available in the Pages panel of the interface. Currently, you can only add pages to the Not Linked section. Let's create a new navigation section by editing the template.conf file. To do so, replace the contents of your template.conf with the snippet below:
{
  "name" : "Developer Platform Beginner Tutorial",
  "author" : "Squarespace",
  "navigations" : [
  {
    "title" : "Main Navigation",
    "name" : "mainNav"
  }],
  "layouts" : {
    "default" : {
      "name" : "Default",
      "regions" : [ "site" ]
    }
  },
  "stylesheets": []
}
This snippet adds a new navigation titled "Main Navigation". Once you push this update to your template.conf, you'll see that the Pages panel now has a "Main Navigation" section for pages and collections.
Rendering the Navigation
Once you add a page to your new navigation area in the Pages panel, you may notice that this navigation doesn't render anywhere on your site. This is because you haven't added the JSON-T required to display the Main Navigation menu on the page.
To do this, you need to create a template for the navigation using a .block file. If you're familiar with other templating languages, you can think of a .block file like a "partial". A .block file can contain any kind of code used elsewhere in your template, most commonly HTML and JSON-T. For an in-depth explanation of .block files, visit this Developer Platform documentation article.
To display the Main Navigation on your site create a file titled "navigation.block" and place it in your /blocks directory. If you don't see a blocks directory, you can create one now. Once you've created your navigation.block file, drop in the following snippet of HTML and JSON-T:
<nav>
  <ul>

    {.repeated section items}
    <li class="{.section active} active-link{.end}">

      {.section collection}
        <a href="{fullUrl}">{navigationTitle}</a>
      {.end}

      {.section externalLink}
        <a href="{url}"{.section newWindow} target="_blank"{.end}>{title}</a>
      {.end}

    </li>
    {.end}

  </ul>
</nav>
This snippet contains more advanced JSON-T than we've seen so far in this tutorial. It iterates over a list of items using a repeated section. It also uses .sections to optionally display HTML if a given key is present in the context. For a more complete discussion, see our documentation on JSON-T directives.
Placing the Navigation
You still need to insert the navigation.block into your site.region. This requires the use of a new kind of tag, Squarespace navigation tag:
<squarespace:navigation navigationId="mainNav" template="navigation" />The Squarespace navigation tag tells the Squarespace platform which navigation ID corresponds with which navigation .block file. The navigation ID must match the "name" of one of the navigations defined in template.conf. The template must match the filename of a .block template in the /blocks folder.
Deep Dive: Squarespace navigation tags use a different syntax than the rest of JSON-T. They use a custom HTML tag with a "squarespace:" prefix. Squarespace tags are used to access data that's not part of the current page's context. For example, the list of links from a navigation. Another example is the <squarespace:query> tag, which lets you access search results. See more in the Squarespace Tags section of the Developer Documentation.
Add the Squarespace navigation tag just above the <main class="content"> in your site.region file. Once you've done this, push your new navigation.block file and your updated site.region file to your site. Refresh your site and drag a page into the Main Navigation section of the Pages panel.
You should now see your page listed in the navigation menu at the top of your site. When you add new pages, they should also show up in your site's navigation menu.
Congratulations! You now have a multi-page website that you can edit in the with the Squarespace editor! In the remaining parts of this tutorial you'll be adding a blog to your website.
Part 5 - Collection Overview
Before we add a blog to your website, let's step back and talk about how blogs, galleries and other sets of data in Squarespace are implemented. Squarespace exposes a single data structure that powers most of the content on a website: the collection. Collections are lists of data that you can display on your website in various ways. For example, you can present a collection all on a single page, or show each item on its own page.
All collections in Squarespace are defined in the template by adding three files; a .conf, .list and .item file within the /collections directory. While collection filenames can have any title, a collection must use the same name for all its files. For example, foo.conf, foo.list, and foo.item would correspond to the "foo" collection.
The Collection .conf File
The .conf file tells the Squarespace platform how each collection is configured. It's a JSON file containing several keys and values that configure the type of collection that you'd like to create.
title: The name of the collection as it will appear in the "Add New Page" dialog.
ordering: The method of ordering for the collection. Available options: chronological, user-orderable, calendar.
addText: Specifies the text used in the "add" button in the Squarespace interface. It is also used in empty collection message when a collection does not contain any items.
acceptTypes: Specifies the post types allowed in this collection. Available: text, image, video.
For a full explanation of collections, visit the Collections guide in the Developer Platform Documentation.
Collection .list and .item Files
While a collection's .conf file uses JSON, the .list file is written with HTML and JSON-T. The .list file defines the default view of your collection and shows all posts in that collection. For example, blog.list will display all posts as a chronological list on a single page.
Like the .list file, the .item file is written using HTML and JSON-T and sets up the structure for how a single post will look.
When you create a collection, it adds a new interface to the editor that you can use to add and edit items. Collections can be used to manage and display any kind of structured data on your website.
Part 6 - Creating a Blog Collection
To begin, create a folder called "collections" in your root directory.
Now, create a file within that folder and name it "blog.conf." Add the following code snippet to that file:
{
  "title" : "Blog",
  "ordering" : "chronological",
  "addText" : "Add Post",
  "acceptTypes" : [ "text" ]
}
Now that you have defined the configuration, create .list and .item files to define the structure. Create a file called "blog.list" and add the following code snippet:
{.repeated section items}

  <!--WRAPPER-->

  <article id="post-{id}" class="{@|item-classes}" data-item-id="{id}">

    <!--POST TILE-->

    <h1 class="title" data-content-field="title">
      {.passthrough?}
        <a href="{sourceUrl}" target="_blank">{title}</a>
      {.or}
        <a href="{fullUrl}">{title}</a>
      {.end}
    </h1>

    <!--EXCERPT OR BODY-->

    {.if excerpt}
      {excerpt}
      <a class="link" href="{fullUrl}">Read More</a>
    {.or}

    <!--MAIN CONTENT-->
      {body}

    {.end}

  </article>

{.or}
  No blog posts yet.
{.end}
And finally, create a file titled "blog.item" and add this code to it:
{.section item}

  <!--WRAPPER-->

  <article id="post-{id}" class="{@|item-classes}" data-item-id="{id}">

    <!--POST TILE-->

    <h1 class="title" data-content-field="title">
      {.passthrough?}
        <a href="{sourceUrl}" target="_blank">{title}</a>
      {.or}
        <a href="{fullUrl}">{title}</a>
      {.end}
    </h1>

    <!--MAIN CONTENT-->

    {body}

  </article>

{.end}
There's a lot of new JSON-T here, which you can investigate on your own. Refer to the Template Language section of the Squarespace Developer Platform documentation for reference.
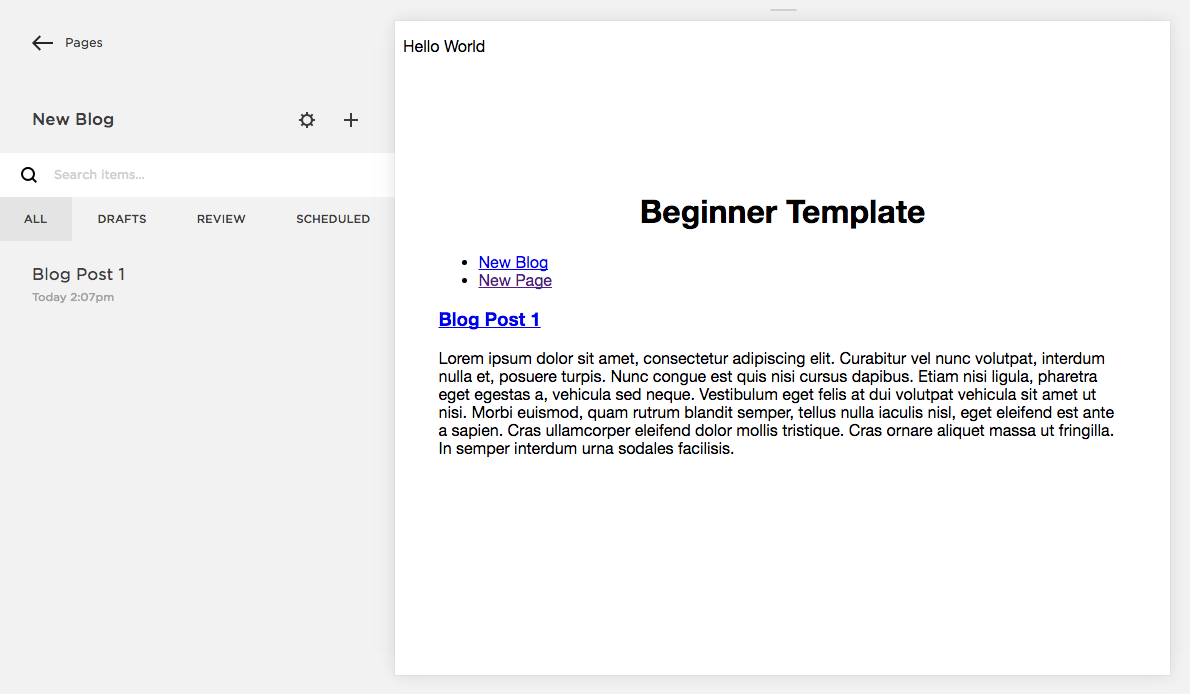
Now when you go to add a page, you'll see the option to add a blog collection:
Try adding a blog, and then adding a new post. When you're done, the Blog collection should look like this:
What's Next?
In this tutorial, you accessed your template code, made your first modifications, used JSON-T to dynamically change your site title, made a navigation and created a blog. Now that you've learned the basics of the Developer Platform, you can take a closer look at our full Developer Platform Documentation and customize your template further. If you have questions, try posting them in the forum where other members of the Squarespace community can help you.